Wednesday, May 31, 2006

GLITCH IN PC MAKES COOL EFFECTS

here is a little gem. Kind of the proverbial Lemonade from lemons. There is this strange thing my Mouse and Stylus do when they both want to be in charge. My computer starts bouncing between the position of the mouse and the stylus.

So as I draw in the PENCIL tool the lines are "echoed" and the computer draws the lines in the exact spot 3 times.

It creates these really weird effects as all the lines are still connected from one block of lines to the next.

The lines in BLUE in the picture show the effect in real time. I took a snapshot of the Screen so you could check it out.

The black lines in the background are the previous batch I made. This usually last for about 5 minutes so I make as many different lines and shapes as I can in the meantime. I used some of these debris patterns in Elsinore in some backgrounds. Posted by Picasa

Tuesday, May 16, 2006

KEEPING IT IN PERSPECTIVE 2

WOW! I still can not get over the new feature I've been playing around with in the previous post. I don't think I have drawn a page yet since discovering this little gem without using it on each page.

One problem I have had working from Adam Warren's layouts for my Iron Man book is to create brush like speed lines and motion blurs like Adam does. Problem solved!

Here's what I do.

Create a CIRCLE. Any size will do. Hit the E button and hold the CTRL (on a PC) and stretch that circle to a real long shape. Now hit the E button again and shrink it down to a smaller size. Now repeat the stretching process again and shrink it down again. Now you have a really long ellipse. THAT LOOKS LIKE IT WAS MADE WITH A BRUSH!

Duplicate these but shrink some even smaller and place them right next to the large ones. This makes a really cool combination. Once you have a whole stack of them you can select "e" again and hold CTRL to stretch these brush looking speed lines into a perspective. I did it in the background behind a race car and it looks great.

I also duplicated these once they were in perspective and shrank them down even more. I colored them white on a black background and it created a "spacewarp" effect like in Star Wars or Star Trek.

I've also created one slightly bent line to match the perspective of a curved street. Then I duplicated that line into about 20 lines on top of each other. keeping them really close together, by the way. I used the "e" and CTRL to distort them. Once they started to distort they kept the curved shape but did it IN PERSPECTIVE. I just laid it down on top of my street scene and it looked like speed lines with a french curve. Something that would have taken a long time by hand was done in a few seconds with this feature!

A NOTE ABOUT LAYERING--
When I drew the street scene I had my street and background buildings on one layer. Above that layer were my curved speed lines. Above that layer was a layer I call WHITEOUT, which I use for small white dots and street cracks to break up the speedlines. Above that layer was the shadow of my car, including the wheelwell Above that layer was the rims of the car's wheels. I did the rims with circles and then distort them, (Again using the "e" CTRL but holding down SHIFT as well to keep the distortions horizontal line straight with the other side.) The rims I am using on every page that the car appears on and just distort it to match the perspective of the car! The layer above that has the body of the car and the layer above that has the shines and white dots of streetlights on the glass.

Pretty cool feature! I can't believe how much I use it now and how much I wish I knew it a long time ago! :)

Friday, May 05, 2006

KEEPING IT IN PERSPECTIVE

ta-Da! A new tutorial entry. yeah!

The picture to the left is a way to make bricks in perspective, but if you just need grid lines follow along...

PERSPECTIVE GRID LINES

1.-Draw one line. Make a copy on that line directly under it by Holding ALT (on a PC) and pulling it down.

2.-Keep it selected and hold CTRL+D and everytime you hit "D" it will duplicate the line as many times as you need.

3.-After you have as many lines as needed select all of them with the BLACK ARROW (Direct Selection Tool) , PRESS THE "E" KEY, and hold CTRL and pull them anyway you need perspective lines.

4.-Duplicate steps 1-3 and make new lines in perspective going the opposite direction. You will then have a criss-crossed, "x" shape pattern great for using for perspective guidelines in the background.

Pro artists don't always draw perspective lines all the way to the horizon line. You need only have some criss-cross for your panel.

Here is a shot of how to make a picture out of some bricks. This spacewalk shot took less than 10 minutes. The squares were WHITE FILL and BLACK STROKE. The background was a black square on a lower layer. The lines in the back were created with my new buddy; the DASHED LINE.

Next time, I will show you how to make some crazy computer terminals with that little gem!

Wednesday, May 03, 2006

A brief FAQ

Whoops! I'm getting behind on this blog! I'm going to answer a few questions from the New Year's post. (So it looks like I am posting again.)
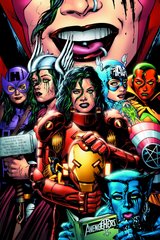
What do you mean by "more often"?
More often now means "soon". LOL This IRON MAN Marvel gig is taking up some of my time here and I was not allowed to show the art yet. But now I can! So "soon" I will have more tutorials up with some of the crazy new things I came up with.

I came up with this AWESOME feature last night. I'm sure you guys already know it, but I've never seen it or used it. So I'll be posting that feature soon.

This should be called The Idiot's Way to Draw in Illustrator instead of one of those Idiot's Guide. LOL

It seems like every day recently I make a new discovery in Illustrator. I'm like Columbus. I discovered a new land...that some people were already living on. Oh well, enjoy my germs. Maybe you can catch something from me that helps you...


What is the difference between Pencilling and Inking?
(I assume you mean in the computer because on paper that's a whole other blog!) My pencilling stage is basically my sketching stage at this point. Using the PENCIL tool with NO FILL and a .01 Stroke. My INKING stage is me drawing very tight final art with the PENCIL tool and a BLACK FILL. I also draw with a WHITE FILL to add extra little details over the black art.


Do you print out to give to the editor? How do you print out?
I don't print out pages to send to an editor.

One of the advantages to drawing on the computer is saving a client's Fed Ex money. No longer do I have to send pages to Marvel for approval and then they send them to the inker and the inker sends it back to Marvel. That's a lot of last minute rushed Fed Ex packages! Now I can wait to the very last possible second and send my TIFF FILES to my editor via e-mail to get paid. :) Plus I don't have to race through traffic, put up with FedEx guys who close the door when I get there, or forgetting my address as I fill out the Fed Ex slips. That really brings a guy down!

Plus my little ol' heart can't take that stress!


I went to a convention in Dallas this past weekend and met a lot of great people. You would not believe how the mouth's drop when I tell people I am drawing in Illustrator. One guy was kind of funny because he was grilling me about drawing in Photoshop instead of Illustrator. "Why do it in Illustrator? Why not Photoshop?", He would ask. I told him over and over how I am doing this or that, and how this feature is better in Illustrator. But he would not have it. I've tried to do this in Photoshop and it drives me crazy. And I know Photoshop! It just works a lot better and faster for me to do this in Illustrator.

Of course what works for one guy may not work for another. We all have our tastes. I prefer it in Ilustrator because I tried the other programs and this works incredibly well for me. I hope you are finding this tutorial helpful.

If you have any more questions please send them! It may help to know what you need to know.

You know?
Brian Denham